Menu
Patient Case Study - An in-depth look of a natural Smile Makeover with Porcelain Veneers
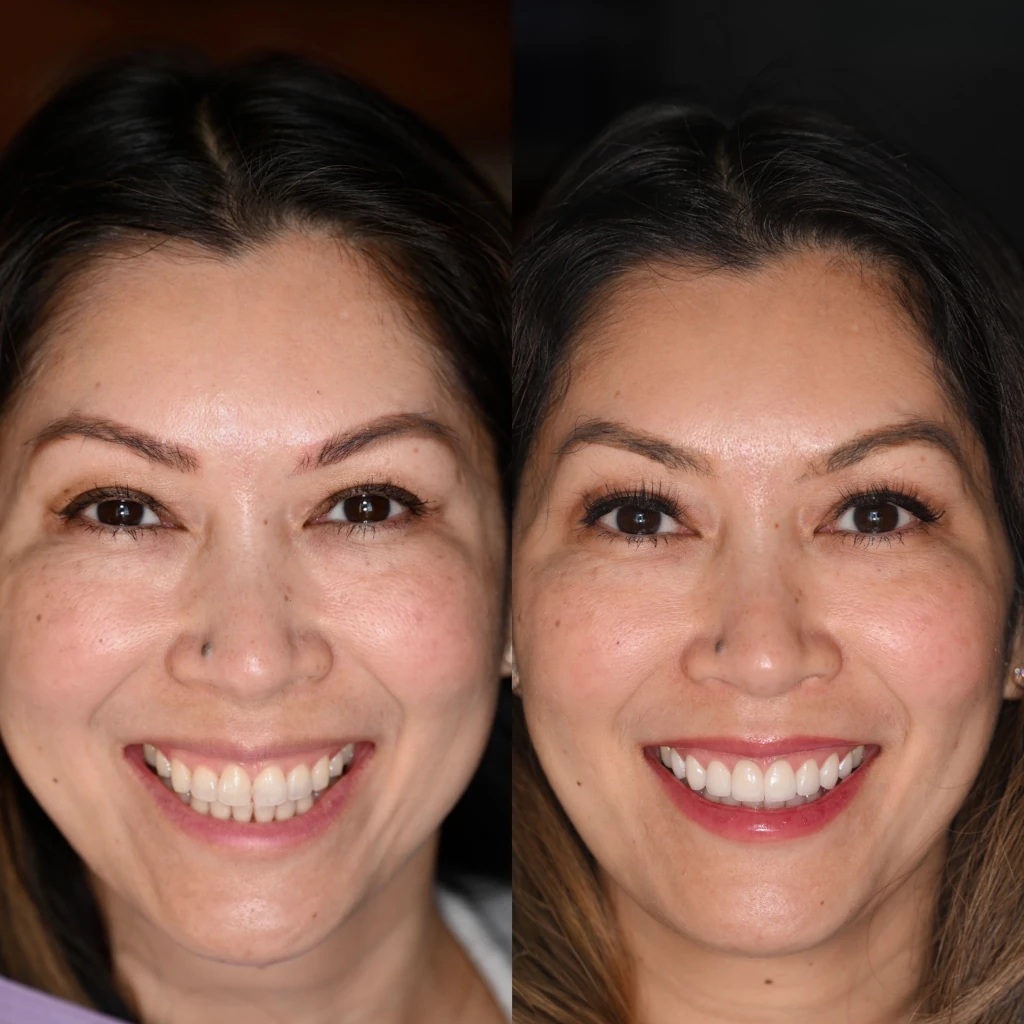
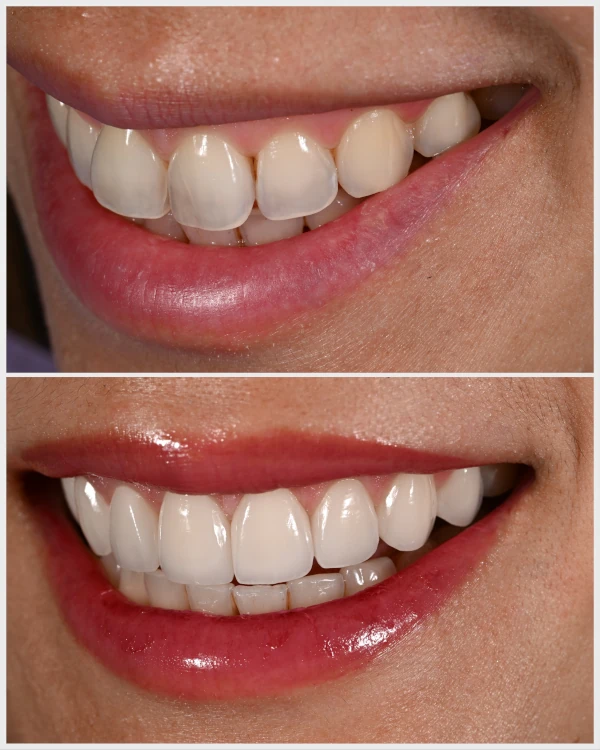
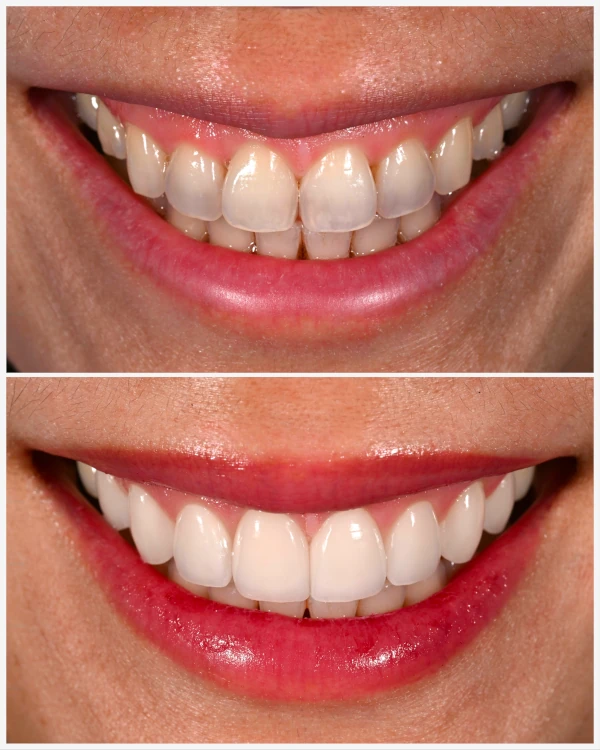
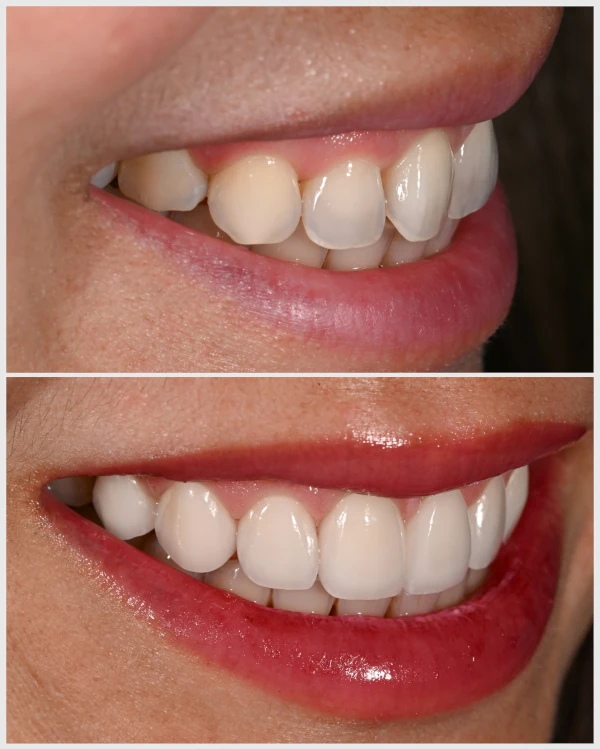
My patient wanted to improve her overall smile. She didn't like that some of her teeth flared out, she had spaces between her teeth, and she felt her teeth also were discoloring. She wanted her teeth to look how they used to look when she was younger!
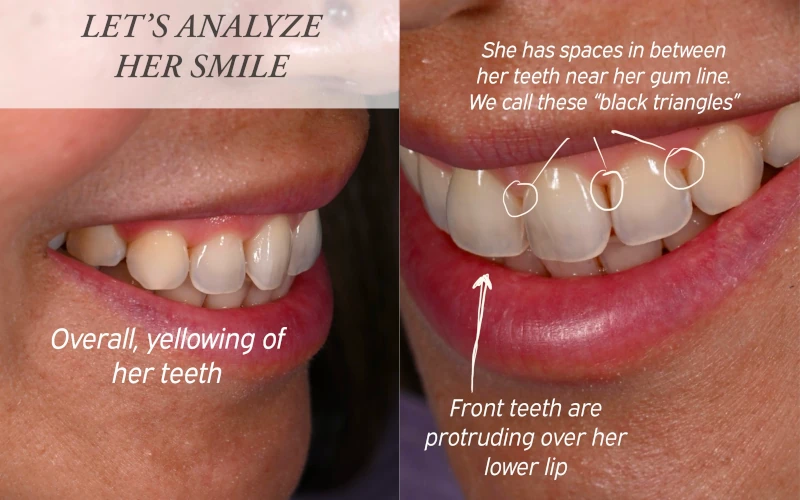
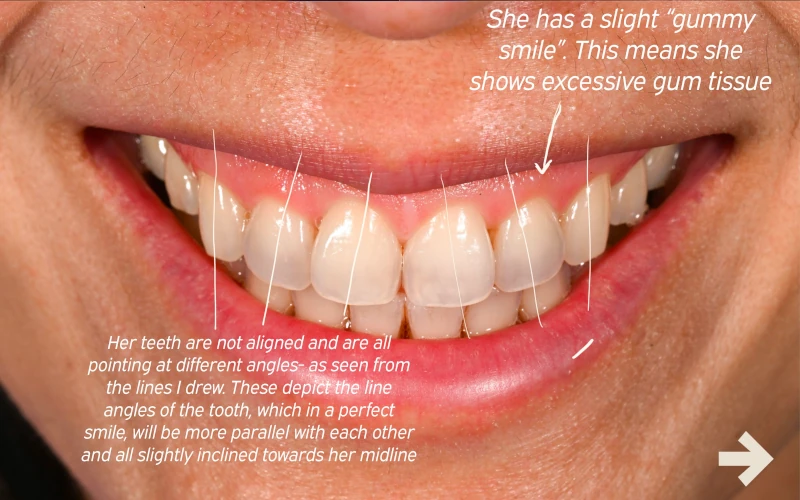
After understanding my patient's goals and really analyzing her smile, I planned and fabricated a mock up of how her final teeth would look. To achieve all her goals and ensure her smile looks natural and beautiful, we did 8 veneers and a gum lift.
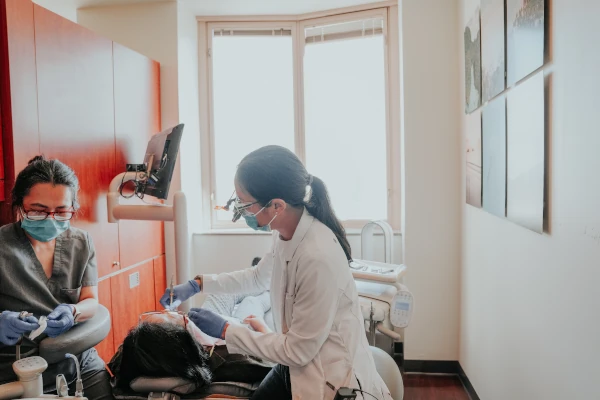
1. Shaping the teeth and creating the temporaries:
As I am shaping her teeth, I envision how the final smile will look and where I want the final teeth to be, ensuring that I remove just enough tooth structure to get beautiful results. If I removed too little, I wouldn't have enough room to correct the teeth that were sticking out and the final veneers could look bulky. If I removed too much, then I would be removing unnecessary healthy tooth structure.
After shaping her teeth and gums, I took an impression for my ceramist and made her temporary veneers directly in her mouth. The temporaries are a preview of how the final veneers will look.
2. Post op to evaluate and refine the temporaries:
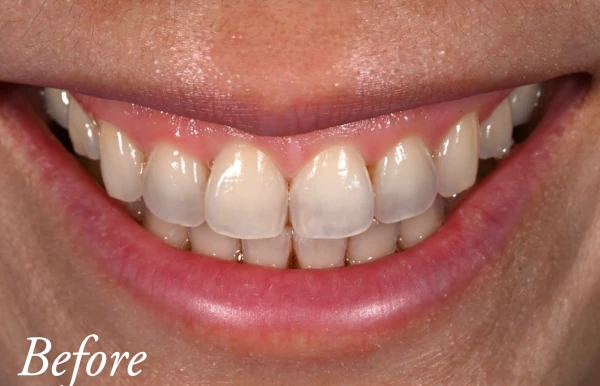
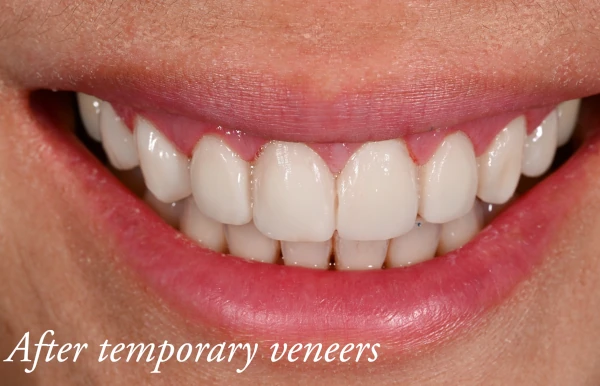
Two days later, I brought her back so we could evaluate the temporaries after the numbness had worn off and she had lived with them for a few days. This gave me a chance to really look at the smile and also let the patient tell me anything she would like changed. I took close-up and full-face photos and went back and forth making small adjustments until we were both happy with the smile. You can see from the photo above that her temporary veneers already looked so beautiful compared to her initial smile.
This step is extremely important because my ceramist uses the temporaries I create as a guide when making the final veneers. I like to get the temporaries as close to perfect as possible to ensure that her final veneers will look beautiful and fit perfectly with her face and smile.
3. Cementing the final veneers:
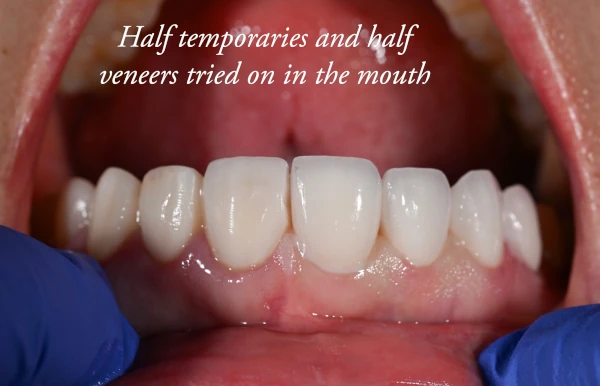
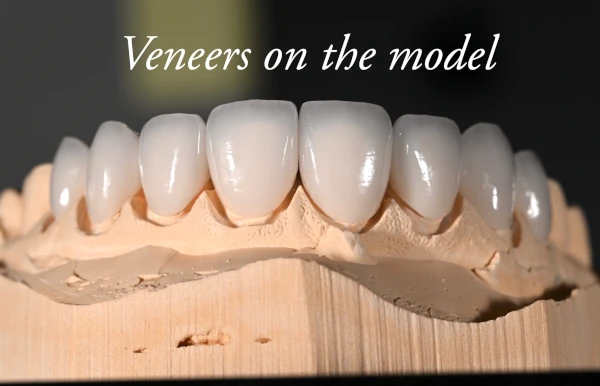
Three weeks later, it was time for the final veneers!
Before her appointment, I tried the veneers on the stone model of her teeth to make sure they matched the temporaries and that everything looked the way we planned.
During the appointment, I first got her numb and then removed half of the temporaries only. I tried on the veneers just on one side of the mouth and compare the veneers and temporaries side by side. This allowed me to confirm that the final veneers matched the smile we already designed.
Once the patient and I both approved everything, it was time to cement them. Cementation is extremely technique-sensitive. I made sure the veneers, teeth, and gums were thoroughly cleaned and completely dry before bonding them to the teeth. This helps create a strong, long-lasting bond and minimizes the risk of the veneers coming off or having open margins over time.
Once cemented, I removed all the excess cement and checked her bite and made final adjustments. I saw the patient for a post op a few weeks later to check the bite again and make any adjustments she wanted me to make.
I absolutely love this result and am so happy for my wonderful patient! She was so ecstatic with the final results!! With the veneers and gum lift, I was able to reduce her gummy smile, close her gaps, and shape her teeth carefully to ensure her final veneers looked more natural and didn't stick out past her lips like her original teeth did. We chose a beautiful shade that is white but still blends with her original lower teeth.
My patient drove from two hours away to see me and had been on a two year hunt to find the right dentist for her and finally found me when one of my posts randomly appeared on her feed. I’m so blessed to meet such great people and have wonderful patients who- despite of my lack of instagram marketing efforts - somehow find me, trust me, and appreciate my work that I put so much effort in. God is good.